Labels

Thursday, 28 January 2016

Chocolate and White Chocolate Mirror Glaze

Working around fondant......

Decorated cakes and themed cakes are really easy to plan and make with fondant..because its basically like play dough..and you can make whatever you want with it... it also gives your cakes a lot of stability, especially if you want to carry your cake someplace else..where in it wont have refrigeration while travelling...whipped cream cake can really melt in such conditions in the heat that we experience over here...
But what do you do if you don't like the taste of fondant..or if fondant is not easily available..In My case i really don't like the taste of fondant, i wouldn't mind a few tiny fondant roses on top if my cake..that too would be put aside while eating...so covering the whole cake with fondant is pointless..as no one in my house or near and dears like fondant...a cake should have just the rite amount of sweetness and it should be fresh and soft...covering it with chewy fondant in my opinion is waste of a good cake...
so anyways the question arises as to what can be used to cover the cake and give it a smooth appearance to make successful themed cakes....and the answer is mirror glaze..
its easy, its cheap, and its tasty, and your cake looks great, and your cake gets stability.

for smaller floral decorations, i found that you can make flowers our of marshmallows which i tried suceesfully and gummy candy too..which is on my next to try list(the list btw is never ending)

  
chocolate mirror glaze with fondant roses and marshmallow flowers
I finally found my answer in chocolate mirror glaze - it like the best thing possible, tastes like chocolate sauce and it actually gives stability to your cake, similar to fondant, and your cake decorations don't spoil on touch (as it would in case of buttercream or whipped cream).
And you can make either a chocolate or white chocolate version depending on the theme of your cake

3D car cake with coloured white chocolate glaze..

I followed the recipe more or less, but reduced the sugar quite a bit as that is my personal preference


Ingredients:-

10 g powdered gelatin ( about two tsp)
150 g sugar (100 g for white chocolate glaze)
100 g water
65 g cocoa powder ( 50 g milk powder - optional - for white chocolate glaze )
65 g fresh cream or heavy cream (75 g for white chocolate glaze)
50 g dark chocolate / white chocolate

Method:- 


In a medium-sized bowl, bloom the gelatin in plenty of cold water. Let the gelatin bloom for at least 10 minutes before using.
 Bring the sugar, water, cocoa powder, and Heavy cream to a boil while stirring constantly.
When it comes to a boil, stir in the chocolate and mix until dissolved.
Squeeze the excess water off the bloomed gelatin, add it to the pot, and stir until dissolved.
Pass the mixture through a fine-mesh sieve, or use an immersion blender to blend the mixture until it is smooth and glossy ( if your mixture already looks smmoth and glossy the you can skip this step)
Transfer the chocolate glaze mixture to a jar, and cover the surface of the chocolate glaze with plastic wrap.
Chill in the refrigerator overnight before using.
When you’re to use it, warm the chocolate glaze to the temperature between 44°(microwaving it for short bursts at medium high , gets the desired result ) before using it. If you do get a a lot of air bubbles in the glaze, strain it through a fine mesh strainer before using, otherwise the tiny bubbles will show on the finished cake.
NOTE It is always necessary to make more glaze than needed, because the entire cake needs to be covered with glaze. As the glaze is poured over the cake, some will pour off, resulting in an even coat. You can rescue some of the dripped off glaze to reuse later and pass it through a fine-mesh sieve.
this glaze can be stored in the refrigerator for more than a month, and can be reused.

My little one's 3rd birthday cake !!!

personally i like the chocolate glaze better than the white chocolate glaze..but this could be because, i'm not a big fan of white chocolate, plus the white chocolate available was not of the best quality...but stability wise they both worked great.....

Coffee mousse cake with marbled glaze for the anniversary !!

Saturday, 12 September 2015

sweet potato cheese straws

Crunchy Munchies......

And perfect tiffin treats...yummy healthy and you can make them in any different types you want..
you can make them cheese flavored, or skip the cheese to make plain crackers, you can also make them multi grain(more flavor + much healthier).
You can make them in any shape you want and your kids will surely love them, as all kids prefer crunchy and snappy snacks to munch on.
I changed the orignal recipe a little to make it a bit healthier

Ingredients:
3/4 cup whole wheat flour
3/4 cup mashed sweet potato
3/4 cup cheddar cheese
2 tablespoons butter, at room temperature
1/2 teaspoon salt
2 tablespoons whole milk
Instructions

Method: 
Preheat oven to 350°F(170 degrees Celsius).
In large mixing bowl, combine flour, sweet potato, parmesan, cheddar, butter and salt. Mix with beater until mixture becomes sandy. Add milk and knead into a ball.
On floured surface, roll dough into a ¼-inch thick rectangle.Cut into ¼-inch wide strips or you can use cookie cutters to get different shapes. Gently transfer strips to a parchment paper lined cookie sheet.
Bake until ends are slightly brown, about 10 to 112 minutes. Remove from oven,cool.


Big Smiles in the tiffin
Classic straws
                                 

Little hearts

I tried also made sweet potato ragi crackers with this recipe which was also a huge success.  

1 cup whole wheat flour
1/2 cup ragi/nachni flour (or any flour blend you chose to use)
2 tbsp toasted flaxseed (ground or whole)
2 teaspoons baking powder
1/2 teaspoon salt
3 tablespoons butter
1 cup of sweet potato puree (two small boiled sweet potatoes mashed with 1/4 cup milk)
1 teaspoon sugar
1 tsp garlic powder (optional)
2 tsp mixed herbs (optional)
pepper or paprika (optional)
sesame seed to top
kalonji seeds to top

Method:
preheat oven to 170 degrees.
Sift flour, baking powder, sugar and salt together into a large bowl. place sifted flour mixture, butter, flax seeds and herbs and spices in the bowl of your food processor and pulse for a few times, until the mixture resembles bread crumbs. add the sweet potato puree and pulse a few more times. the dough should come together, if it feels to dry you can add a little milk. but be careful not to make it too soft.
bring the dough together by hand and divide into 4 - 5 large portions.
roll each portion as thin as you can, an easy tip for rolling thin portions is to roll them in between wax paper or cling wrap.if you want to top them with sesame seeds, sprinkle sesame and kalonji seeds on top and roll once with your rolling pin to seal the seeds. Cut into any desired shape and bake in the preheated oven for 10 minutes.

healthy smiles


Wednesday, 29 July 2015

Masala herb cookies


Savoury trinkets....

every indian loves kharis, and butters, and toasts...what if you get smething similar, but with added flavour, and a bit healthier..everyone is gonna say WHY NOT...
I loved the flavor of these cookies and the versatality, the herbs can easlisy be changed to whatever herbs you want to add and you can add or reduce, any herb that you don't have a liking for. The final cookies have a very subtly sweet n savory flavour that goes really well with a steaming cup of tea. It also make a nice snack to add to your little one's tiffin.
I adapted this recipe to my liking.


Ingredients:

3/4 cup all-purpose flour
1 cup whole wheat
2 tablespoons fine white or brown rice flour (optional)
1 teaspoon baking powder
1/4 teaspoon baking soda
1/2 teaspoon salt (or according to your taste)
1/2 cup chilled butter, cut into small pieces
3/4 tsp dried ginger powder (optional)
1-1/2 teaspoon whole peppercorn, crushed coarsely
1-1/2 teaspoon cumin seeds, toasted and crushed coarsely
1 tablespoon granulated sugar
1-1/2 tablespoons finely chopped curry leaves
1 tablespoon each finely chopped fresh cilantro,mint and dill leaves
3 to 4 tablespoons cold yogurt

2 -3 tbsp toasted sesame seeds or flaxseeds or both.
A little oil to brush the tops of the biscuits/ cookies

Instructions
Put both flours, salt, baking powder and baking soda into the bowl of a food processor and add the pieces of chilled butter. Pulse until the mixture takes on the texture of breadcrumbs.
Now add the crushed peppercorn and cumin, sugar, the chopped curry leaves and coriander leaves. Pulse a couple of times to mix well.
Then add 2 tablespoons of yogurt and pulse again. Add one more tbsp of yogurt (or two, as much as needed), and pulse again until the dough just comes together and clumps together. You want a moist dough, not a wet one – somewhat like pie dough.
Do not over process or knead. The dough should be just moist enough for you to use your hands and bring everything together to shape into a ball. Flatten it into a disc and cover the dough with plastic wrap and let it rest in the refrigerator for at least hour. You can also leave it overnight (up to about 24 hours) and work on it the next day.
Pre-heat your oven to moderate 170 degrees and line your baking trays with parchment or grease them with oil.
Lightly dust your working surface and roll out the dough to 1/8”(3 mm) thickness, not more or your biscuits/ cookies will not be crisp. If using Sesame seeds, sprinkle it uniformly over the dough and use your rolling pin, very lightly, to press them in.Using cutters of your choice (about 2-1/4 inch in size), cut out biscuits/ cookies and place them on lightly greased baking trays. Brush a very thin coat of oil over them. This will help them brown while baking. Bake them in a preheated moderate oven for about 20 to 25 minutes or till they’re done and golden brown on the top. Remember the baking time will depend on the thickness and shape of your biscuits/ cookies. Let them cool on the trays for about 5 minutes and then cool them on racks. Once they’re completely cool, they should be a bit crunchy and not chewy.


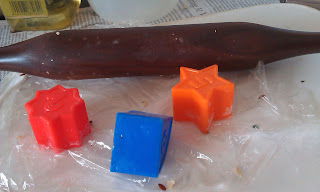
I improvised and used my son's shape
 toys as cookie cutters to get all kinds of shapes
perfect for the tiffin !!


round one's to have with tea

Saturday, 11 July 2015

hazelnut thumprint cookies


Fun Prints...

Thumprint cookies look cute and are yum...they are also very versatile, you can fill them with any filling of your liking.. I especially like the soft crumbly cookie...reminded me of the cookies we used to get in lebanese bakeries....
the recipe is also very very simple and you can have a batch of cookies ready with hardly any fuss.
Its a classic hershey's recipe so you can't go wrong with it...


Ingredients:
chocolate ganache or nutella
1/3 cup Cocoa powder
1/4 teaspoon salt
1 cup chopped hazelnuts (or any other nut)
2 tablespoons milk
1 teaspoon vanilla extract
1 cup all-purpose flour
1 egg
1/2 cup butter or margarine
2/3 cup sugar


Method:
1. Beat butter, sugar, egg yolk, milk and vanilla in medium bowl until fluffy. Stir together flour, cocoa and salt; gradually add to butter mixture, beating until blended. Refrigerate dough at least 1 hour or until firm enough to handle.
2. Heat oven to 350°F. Lightly grease cookie sheet or line with parchment paper. Shape dough into 1-inch balls. With fork, beat egg white slightly. Dip each ball into egg white; roll in nuts. Place on prepared cookie sheet. Press thumb gently in center of each cookie.
3. Bake 10 to 12 minutes or until set.
Remove cookies from cookie sheet to wire rack; cool 5 minutes. Spoon about 1/4 teaspoon ganache into each thumbprint.
Cool completely.
makes about 24 cookies

I tried the same recipe by substituting
 1/3 cup of ground almond and sesame seeds instead of the cocoa powder to make some almond cookies, and added a little bit of almond essence.. and got really nice chewy almond cookies.


Saturday, 27 June 2015

double chocolate banana muffins

Going Bananas....


I love a freshly baked banana bread anytime, but some how whenever i've gone through any recipes with chocolate and banana, it always used to weird me out, i couldn't get myself to imagine liking that combination (even before trying it).
So when i read this recipe, i thought the best way to know whether i'll like it or not is to try in once and for all..they recipe looked quite appealing and easy, so i went ahead a gave it a try.And i was convinced.I got lovely moist chocolaty muffins, with just a hint of banana flavor, which actually tasted good.
I substituted all of the refined flour for whole wheat and oats, because the moisture from the bananas take care of not making the cake dry. So what you have is yummy chocolaty, whole wheat muffins..

Ingredients:
2 medium bananas (about 1 cup), over-ripe
1 tsp pure vanilla extract
1 large egg
1/2 cup canola oil
1/3 cup + 1 tbsp milk (or sub 2% dairy milk)
2/3 cup granulated sugar
1 tbsp (packed) light brown sugar
2 tbsp unsweetened cocoa powder (look for dutch-processed)
1/2 tsp sea salt
1-1/8 tsp baking soda
1 cup whole wheat flour
2/3 cup ground oats
1/4 cup miniature chocolate chips (bittersweet or semisweet)

Method:
Preheat the oven to 375 degrees.
In a large mixing bowl, use the back of a fork to mash the banana until only very small lumps remain. Add the vanilla and the egg and use the fork to whisk the mixture together until completely combined. Add the oil and milk and stir to combine. Add the sugars and stir again.
Using a spatula, stir in the cocoa powder, scraping down the sides of the bowl as necessary. Mix until the cocoa is completely incorporated. Stir in the salt and baking soda, then gently fold in the flour, until just combined.
Divide the batter among 12 paper-lined muffin cups, about 3/4 full. Sprinkle with the chocolate chips. Bake for 15-17 minutes, rotating once, until the muffin tops look set, and a cake-tester inserted into the center of the muffins comes out clean. Remove from the oven and let cool in the muffin tin for 5 minutes, before removing and cooling completely on a baking rack. Serve warm or at room-temperature.

miniature muffins for little one's tiffin

I know..who would believe these are actually heathy !!!

Thursday, 25 June 2015

Chapati Crisps

Say no to chips no more....

trying to teach your toddler to eat healthy can be quite a challenge..especially in this day and age when every unhealthy snack is packaged especially to attract kids..So it gives me great pleasure when my little one especially requests for these..
the simplest to make and great for the tiffin too...Also a great way to utilize left over rotis..


Ingredients:
2  - 3 rotis cut into triangles or any desired shape..
2 - 3 tsp of oil
a pinch of salt ( try to add as less as possible, so that kids have an early habit of less salt)
oregano
red chilli powder or black pepper powder
garlic powder

Method:
preheat the oven to 160 degrees, grease a flat tray or cookie sheet 1 tsp of oil (you can preheat the tray too for better results)..
mix 2 tsp of oil and all the spices with the cut roti in a bowl. (you can add your own choice of spices).
dump it all in the cookie tray and bake for 10 - 12 minutes..after removing from the oven if some pieces are not yet crisp, keep it in the oven for 3 -4 more minutes (usually doesn't take more than that).
cool completely and serve to ur little one...you could also serve it with a dip to older kids..

Friday, 29 May 2015

victoria sponge

Classic Buttery treat...

I think this would be the oldest and simplest plain butter cake recipe...Its ideal for people who want to start learning the basics of baking, and the end result is a lovely golden yellow buttery sponge cake, that can be layered with jam, nutella, or had just as it is.
This one is an old recipe, dug out of some of my mom's files...oh how i miss that file sometimes.....

layered with chocolate ganache n almonds


Ingredients:
100g butter
100 g powdered sugar
2 eggs
100 g flour
1 tsp baking powder
a pinch of salt
1 tbsp warm water

Method:
cream butter and sugar until it becomes soft and fluffy. Add eggs, one at a time beating well. fold in sifted flour, baking powder and salt, mix lightly and evenly, stir in warm water. Spread mixture evenly in a pan.
bake in a preheated oven at 180 degrees for 20 minutes. until well risen.
serve with jam, chocolate sauce or whipped cream...or just plain doesn't matter it still tastes awesoeme.


layered with coconut cream

Friday, 10 April 2015

Chocolate Fudge

Melt in your mouth cubes..

I you are from Mumbai, or have been to any of the maharashtrian hill station (matheran, mahabaleshwar, khandala, lonavla). You would have surely brought bag their signature fudge..its gooey, its oily, not very chocolaty..and i would actually call it more of a chocolate walnut halwa, than fudge...whereas fudge in the west is block of soft chocolate, that melts in your mouth....and much better than out maharashtrian version.
Easier to make than truffles (provided you pick the quick n easy recipe) and equally yummy, this candy recipe is perfect as a home made gift or to serve and children's birthday parties, or to just eat.


Ingredients:
1 can sweetened condensed milk (400 g)
350 g dark chocolate
150 g chocolate praline/butterscotch chips (optional)
125 g whole hazel nuts
125 g whole almonds
1 tsp vanilla powder
2 pinches salt

you can also add roasted peanuts or pistachios in place of almonds and hazelnuts, or if you have a nut allergy, then you can skip the nuts all together.

Method:
Roast the nuts for 10 mins in a preheated oven at 180 degrees.
melt the chocolate either in the microwave or on a double boiler.remove from heat and add the condensed milk into the chocolate. mix to obtain a thick paste, then stir in quickly hazelnuts, vanilla and salt.
Pour into a rectangular silicone mold or a dish lined with parchment paper.
refrigerate for at least 4 hour and the cut into cubes using a good chef's knife and a cutting board. you could also try setting it in individual silicone mold. although haven'e tried it yet.

Friday, 13 March 2015

yoghurt mousse

Who says healthy can't Be tasty....


Its yoghurt, its fruit, its yummy, its healthy....especially if layered with a whole wheat sponge...YES!!mthats rite, you heard rite...substituting refined flour with whole wheat in my sponge cake recipe is an idea thats been ruminating in my mind since a while now. As i have already substituted whole wheat in most of my recipes successfully, the trick is to simply reduce the quantity of flour a little or add a mix of oat flour and wheat flour. in this case I only reduced the amount of flour from 9 tbsp to 7 tbsp (since this was a plain sponge didn't add any cocoa or custard powder, hence 9 tbsp). and thankfully my sponge turned out nice and soft and spongy.
the mousse is quick to make, and for fruit mousses, the yoghurt gives a nice tart flavour to the overall dessert.
i have so far tried a lemon mousse, orange mousse and of course strawberry mousse.....next on my list pineapple mousse......

Proud of my sponge !!!


Ingredients:
200 g strawberries, pureed
200 - 250 g hung curd (made from 500 g curd)
5 - 6 strawberries chopped
2 packets of whipped cream powder. (prepared)
10 g gelatin (if preparing in individual glasses, you can sip the gelatin)
powdered Sugar, as required.
2 sheets of sponge cake (if you want a mousse cake) / for individual mousses you can also use biscuits soaked in milk.

Method:
prepare whipped cream as per package instructions and refrigerate. Soak gelatin in two tbsp of water for 5 minutes, then add 2 tbsp of boiling water to dissolve.
Beat the hung curd with powdered sugar until smooth, make sure there aren't any lumps. add in the pureed strawberries and gelatin. fold in the whipped cream and chopped strawberries.
If you want to make individual glasses or bowls you can straight away set in those and refrigerate for 4 - hours.
For mousse cake. refrigerate for half an hour. Take a deep dish or a spring-foam pan. place a layer of sponge cake at the bottom, you can soak with a little syrup if you want, cover it with half the mousse mixture, add another layer of cake, and cover with the remaining mousse mixture. cover and refrigerate overnight for best results.

lemon mousse..


For lemon mousse: add 2 tsp of freshly grated lemon zest and 3 - 4 tbsp of lemon juice, depending on the taste and tartness.


For orange mousse : use 2 tbsp of freshly grated orange zest, 1/4 cup of orange juice, 1 tbsp lemon juice.


Friday, 13 February 2015

chocolate self-saucing pudding

Gooey Goodness....


chocolate and gooey together make awesome...i'm telling you, its like a cake on top of a pool of chocolate...no exaggeration...SERIOUSLY....
this recipe doesn't need much more of an intro...its pretty simple to make...and pretty awesome to eat... 


Ingredients:
1 cup flour
1/2 tsp baking soda
1 tsp baking powder
1/2 cup castor sugar or powdered
1/4 cup cocoa powder
1/2 cup water
1 egg

For sauce:-
1/4 cup cocoa
1 cup brown sugar
1 tsp cornflour
1 cup hot water

Method:
Preheat oven to 180 degrees. grease 6 ramekins or 1 large baking dish.
combine the flour, sugar, and cocoa in a large bowl, add water and egg and combine well. Divide mixture between prepared dishes or cups.
Make sauce by whisking together cocoa powder, brown sugar, corn flour, and water. Gently pour over the pudding mixture.
Bake for 15 - 20 minutes.Until the crust is formed and the centre is gooey.
serve warm with a scoop of ice cream.


even better with icecream


Saturday, 10 January 2015

badaam halwa

Mummy Ka Magic...


Here is that one recipe, that i haven't made myself, but I absolutely had to share it.
Almond Halwa is my mom's speciality, every winter she makes this batch of yummy melt in your mouth barfis, that are too die for.Its healthy, Its yummy and it's filled with all the love that a mom has to offer.
The funny part is I know the recipe, I've seen her make it lots of times, I've actually helped her make it many times, but still when it comes to badam halwa, I always ask her to make it instead of making it myself,Can't really explain it..buts thats the way it is with these little sweet diamonds...


Ingredients:
250g Almonds, peeled
200g sugar
1 cup water
1/2 cup ghee
1 lt Milk
100g edible gum, optional

Method:
soak almonds overnight and peel. Grind almonds along with milk and make a smooth paste. Add water to sugar and cook to make sugar syrup. once the syrup is ready add ghee and the almond paste. Cook on low heat till it is quite thick and ghee starts coming on the surface ( about 1 to 1 1/2 hours).
Fry the edible gum in 1 tbsp of ghee seperately, crush and add to the halwa when it is almost dry.
Remove from heat and spread on a tray and flatten it.refrigerate to make it firm. Cut into small diamond shaped pieces.

Tuesday, 6 January 2015

Stromboli

Or Pizza Rolls


Its amazing how a single recipe can be made and presented in several different ways, and enjoyed by all in several different ways....
the Pizza is a classic example of this...you can make a classic large pizza, individual mini pizzas, A stromboli or a pizza roll, or mini pizza buns, or make it easier and just make toastizzas...i'm telling you when you have bread with any kind of pizza topping, you can never go wrong.

pardon the bad picture !!


A stromboli is basically a closed pizza, that looks like a log of bread from the outside , but had all the pizza topping stuffed inside...waiting to ooze out when sliced.


Although once sliced it looks good enough

There is nothing much too the recipe..
just prepare a batch of pizza dough .
prepare a batch of any type of filling that you would like..
A standard pizza filling of shredded chicken, capsicum,mushrooms, tomato sauce,onions and cheese 
Or you could try a filling with chicken and corn in white sauce.


OH THAT PERFECT BRAID !!

I tried a braided bread with a minced beef in tomato sauce and cheese which also turned out really tasty, and to look at the lovely braid...didn't even feel like cutting it..


Few tips that you should keep in mind..that i learnt from my mistakes...

  • if making a simple roll with no design, please give a few cuts on the surface for the steam to be let out, and to prevent cracking and breaking
  • don't make your filling very wet or runny as it will ooze out while baking creating a wet gooey mess..


Wednesday, 17 December 2014

assorted mousses

Who Doesn't Like a Mousse


This post is a long pending one...the reason why its been on hold ?? well I make my chocolate mousse very often and its another recipe from back when i was a teenager, but...nobody waits long enough after its made for me to photograph it (me included)...so due to lack of proper pics its been in my draft list for a really long time...and still the pics that i finally did click are not the best quality...
This one is a really simple recipe that i got out of a weekly magazine once upon a time...
the best part of the recipe is that i use the same recipe for making any different flavour of mousse, and thankfully it has never betrayed me till now..


Mango Mousse ...
Ingredients:
1/2 cup cold milk
1 tbsp gelatin
3/4th cup hot milk
3/4th cup chocolate pieces
1 cup whipped cream
1 tbsp vanilla essence
1 egg
1/4th cup sugar
6 - 8 ice cubes


Method:
Coffee mousse in a Coffee cup !!!
Soak gelatin in cold milk (you can do it directly in the blender). Blend cold milk and gelatin for one minute. Add hot milk and blend for one minute.
Add egg,  sugar, chocolate, cream, vanilla essence and blend for one minute. one by one add ice cubes and blend for one minute and refrigerate.


The Classic - Chocolate mousse


note:- You can substitute the chocolate for

  • 1 cup of any fruit puree 
  • 1/4 cup of fruit preserves or concentrates
  • 1 - 2 tbsp of instant coffee
or if you can think of any other flavor do let me know... like i said its never failed me as of yet. I've been thinking of trying it with a packet of jello. will let you know how that turns out.


Strawberry mousse cake...

Sunday, 7 December 2014

Tiramisu

The Aroma of Coffee.....

Oh how i love the smell of coffee....i don't make coffee based desserts very often, due to my little son...But personally I just love coffee desserts...and especially a Tiramisu...
there is just something about that perfectly coffee soaked sponge layered with the silky smooth cream, that once I take a small bite, I really can't stop myself from devouring the rest of it (It takes a lot of self control to keep some for others)
this is not a classic tiramisu recipe...coz that takes a lot of time and I prefer it lighter with less amount of eggs and yolks in it. also due to the unavailability of lady finger biscuits in mumbai, i make it with a normal sponge cake. (doesn't make a difference to the taste as lady finger biscuits are basically sponge biscuits)

Ingredients:
400 - 500 g Mascarpone cheese or cream cheese
1 cup Whipped cream
Powdered sugar, as required ( 5 - 6 tbsp approx)
2 cups strong black coffee (with sugar)
Sponge cake or lady finger biscuits

for the mascarpone cheese:-
400g fresh cream
200 - 250 ml milk (can add 3-4 tbsp of milk powder to increase the amount of cheese)
1 - 2 tbsp freshly squeezed lemon juice or white vinegar

Method:
for the mascarpone cheese:-
Mix the cream and millk and milk powder (if adding) in a skillet, and heat on midium stirring constantly until it just starts bubbling, add in the lemon juice. heat until the cream curdles, stirring frequently. the cream should cover the back of the spoon. line a sieve with 2 layers of cheese cloth and set over a bowl. pour mixture into the sieve. once cooled completely cover with plastic and refrigerate overnight.

For the Cream:-
Beat the cheese and sugar until smooth, without any lumps. fold in the whipped cream, and 1 or 2 tbsp of prepared coffee.

Assembly:-
If using sponge cake, you should have to equal sized layers of cake that can fit into deep dish. My sponge cake recipe makes exactly two layers of cake. that i bake separately. place the first layer at the bottom of your dish and generously soak it with prepared coffee. alternately if using lady finger biscuits, dip each biscuit in coffee and arrange such that it covers the bottom of the dish. Cover the cake with a thick layer of prepared cream and dust lightly with cocoa powder. cover with the second layer of cake, soak again with coffee, cover with the rest of the cream and dust with cocoa powder. refrigerate to set for atleast 2 -4 hours before serving. you can reserve the final dusting of cocoa powder for just before serving for a better look. (that is if it ever get served, you can eat the whole thing yourself, i wont question you)

Once you Start eating..that is not a lot

You can also make individual glasses

Monday, 17 November 2014

No bake Chocolate Biscuits

Cold Cake...

this is another one of our childhood recipes (me and my sister's), back when we had begun cooking and wanted to try all things fun..
its a really simple recipe that i still whip up at times for a quick chocolate fix. It is also a great recipe for letting your kids make and get them interested in cooking.

tastes something like a chocolate wafer bar.

Ingredients:
1 cup sugar
1 cup oil
2 tbsp cocoa powder
180 g cream (or 150g)
2 big packets of marie biscuits
3/4th cup oil

Method:
mix sugar, milk powder, cocoa powder, cream and oil in a sauce pan.
heat the mixture continously for 10 mins. break the biscuits into four equal parts and add into the saucepan after turning off the heat.
line a flat tray with foil. pour the mixture onto the foil. cover the mixture with the loose ends of the foil paper. chill the mixture in the freezer for atleast 1 hour.
can tranfer to the refigerator for storing. 

ENJOY!!

Wednesday, 5 November 2014

Triple Layer Oreo cake

Slice of heaven....


By Far the Best cake I have made.....according to public and personal opinion...
I had always wanted to make a three layer cake, and this Oreo cake was being designed in my head since quite a while...originally i had wanted to make a smaller version of the same cake for my niece's first birthday...but due to certain circumstances that got cancelled...so i thought why not make it for my little one's second birthday, then again his birthday was like just two days before eid...so I finally Made it on Eid, when all my beloved family comes over, i mean why keep a good thing to yourself.

Decorate it what ever way you like

for my three layers I made two layers of white sponge cake with oreo chunks in it, and one layer of moist chocolate cake in the centre. 
For the oreo sponge I used my swiss roll sponge recipe.The only difference to the recipe i made was that i used two eggs in each cake layer instead of three and reduced the sugar a little.i didn't use any custard powder this time since i wanted a white cake
I mixed separate batches and baked the cake separately. also make sure to hand chop your oreos and not blitz them in a chopper as then they become too fine, and your cake will have more or less a brown color. Also fold inn the oreos in the batter at the very last moment before baking, so that it retains some of its crunch after baking. 
For Frosting I used whipped cream powder, which i blended with half milk n half cream, to get stiffer cream.and mixed oreo chunks into it. I needed 5 packets of whipped cream powder for this big a cake, and three big packets of oreos.
reserve some oreos for decorating and chop the rest.
While completing the cake, make sure to moisten the layers with light sugar syrup. so that the layers completely merge and blend into each other, to give that "Oh So Good taste".


lovin the layers !!